
The complete procedure from the GloEn-Patrol service manual, with the exact part numbers, bolt sizes, the series-circuit alarm diagnosis nobody explains,
and how to pick the right replacement lamp and sleeve for your chamber.
by the Fiver marine technical team. ~11 min read · 2,450 words
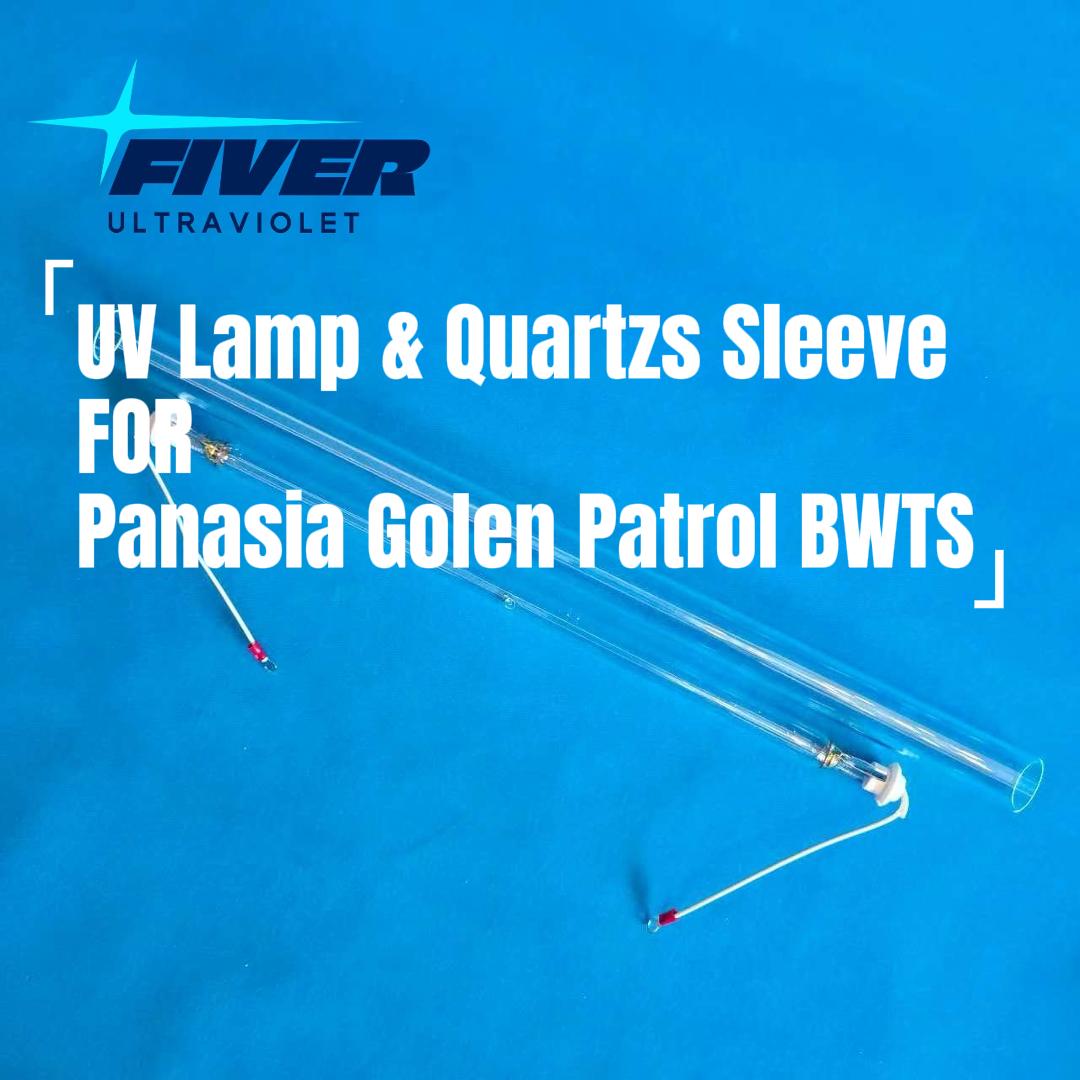
Fiver OEM-equivalent MP UV lamp and quartz sleeve for the Panasia GloEn-Patrol BWTS.
On this page
Quick Answer
Replacing a UV lamp in a Panasia GloEn-Patrol™ BWTS takes about 15–20 minutes per lamp and follows six steps: isolate power → remove the side covers → unscrew the round bolts and isolating bracket → pull the anti-vibration module → slide the old lamp out of the quartz lamp sleeve → fit the new lamp and reassemble in reverse order.
You will need the 6 pcs M4×12L round bolts (Part No. 54), the 1 pc M4×6L bolt on the isolating bracket (Part No. 19), the anti-vibration module (Part Nos. 96, 98, 99, 100), a fresh O-ring (Part No. 102) and clean, powder-free gloves. Quartz sleeve (lamp sleeve, Part No. 12) replacement follows the same teardown plus the screw plug, and adds 30–45 minutes — usually scheduled at the same time as the lamp change.
Bottom line: always cut the main circuit breaker and the relevant lamp circuit breakers in the UV Power Supply panel before you touch anything. Panasia medium-pressure (MP) lamps run at 600 °C+ surface temperature and stay hot after shutdown.
Why this job matters more than it looks
The GloEn-Patrol is a 100% physical, chemical-free ballast water treatment system. It works in two stages:
Filtration — the filter removes organisms and sediment larger than 50 µm.
UV disinfection — the UV chamber neutralises everything smaller than 50 µm (bacteria, algae, viruses, pathogens) so it cannot reproduce after discharge.
The UV chamber is the compliance-critical half of that equation. Every lamp sits inside a quartz sleeve that keeps the lamp dry and lets UV-C through. The two components fail in different ways and on different clocks:
Lamps lose UV-C output gradually and reach end of useful life (rated up to 4,000 operating hours on Fiver replacements).
Quartz sleeves do not "wear out" electrically — they foul (scale, iron oxide, organic film) and lose transmittance, or they develop cracks and start leaking water toward a live lamp.
If either degrades, your logged UV intensity drops below the system setpoint, the BWMS starts refusing to discharge, and you are one port state control inspection away from a detention under IMO D-2 / USCG requirements. Replacing lamps and sleeves on schedule is the cheapest compliance insurance on board.
Before you start: parts, tools and PPE
Panasia GloEn-Patrol part numbers used in this procedure
The part numbers below are exactly the ones referenced in the GloEn-Patrol lamp replacement procedure. Keep this table with your spare parts list.
| Part No. | Description | Where it goes | Typical quantity |
|---|---|---|---|
| 12 | Lamp sleeve (quartz sleeve) | Encloses the UV lamp inside the chamber | 1 per lamp |
| 13 | Screw plug | Seals the end of the lamp sleeve | 2 per sleeve |
| 19 | Isolating bracket | Holds the lamp base at each end | 2 per lamp |
| 54 | Round bolt, M4×12L | Fixes the lamp base plate, both ends | 6 per end |
| — | Round bolt, M4×6L | Fixes the isolating bracket, both ends | 1 per end |
| 64 / 65 | Side covers (left / right) | Outer UV chamber covers | 1 pair per chamber |
| 96 | Anti-V cushion | Anti-vibration module | 2 per lamp |
| 98 | Anti-V stopper | Anti-vibration module | 2 per lamp |
| 99 | Anti-V O-ring | Anti-vibration module | 2 per lamp |
| 100 | Anti-V spring | Anti-vibration module | 2 per lamp |
| 102 | O-ring on the screw plug | Watertight seal of the sleeve end | 2 per sleeve |
Note: Panasia builds the GloEn-Patrol across several chamber capacities and models (for example PU50, PU250 and PU500, plus explosion-proof PU###-Ex units). The procedure is the same, but bolt counts and drawing details can vary slightly by capacity. Always cross-check against the UV unit drawing attached to your own manual.
Tools and materials
Insulated gloves, safety glasses, and clean powder-free gloves for handling lamps
Insulated screwdriver / hex keys for M4 bolts
Alcohol wipes (for lamp glass and quartz sleeve outer wall)
New O-rings (Part No. 102) and a soft, lint-free cloth
Panasia UV Lamp Test Kit (for post-replacement fault diagnosis)
A sealed container for old lamps (mercury-containing waste)
Non-negotiable safety cautions
Switch OFF the main circuit breaker and the relevant lamp circuit breakers in the UV power supply panel before starting any work.
The lamps can be HOT. Allow a cooling period before touching or dismantling components.
Never touch the UV lamp glass with bare hands. Skin oils create hot spots and shorten lamp life. Wear clean gloves and hold the lamp by the ceramic ends.
UV-C is harmful to eyes and skin. Never look at an energised lamp without UV-rated eye protection.
Lamps contain mercury. Do not dispose of them as ordinary waste — follow your local environmental regulations and your port's disposal guidance.
Remember that UV lamps must be installed horizontally, regardless of whether the reactor itself is mounted vertically or horizontally.
Part 1 — How to replace the UV lamp on a Panasia GloEn-Patrol
A. Dismantle the old lamp (Steps 1–6)
| Step | Action |
|---|---|
| 1 | Turn off the main circuit breaker and the relevant lamp circuit breakers in the UV power supply panel. Lock out / tag out. |
| 2 | Remove the side covers (Part No. 64, 65) from both sides of the UV chamber. |
| 3 | Unscrew the round bolts (Part No. 54), 6 pcs × M4×12L, from both the right and left ends. |
| 4 | Unscrew the round bolt, 1 pc × M4×6L, on the isolating bracket (Part No. 19), from both ends. |
| 5 | Take out the anti-vibration module (Part Nos. 96, 98, 99, 100) from both ends — Anti-V cushion (96), Anti-V stopper (98), Anti-V O-ring (99), Anti-V spring (100). Keep these together; they are re-used. |
| 6 | Take the UV lamp out of the lamp sleeve (Part No. 12). Hold it by the ceramic base only, and support the far end as it slides free. |
B. Install the new lamp (Steps 1–8)
| Step | Action |
|---|---|
| 1 | Unpack the new UV lamp — Panasia supplies new lamps individually packed for a reason: keep it in its protective sleeve until the moment of installation. |
| 2 | Fit clean gloves and hold the new lamp only by the edge / ceramic sides. Never touch the quartz envelope with bare skin. If the glass is soiled, wipe it with an alcohol wipe and let it dry. |
| 3 | Insert the new UV lamp into the lamp sleeve (Part No. 12). |
| 4 | Re-insert the anti-vibration module (Part Nos. 96, 98, 99, 100) into the lamp sleeve at both ends. |
| 5 | Screw the round bolt (1 pc × M4×6L) back onto the isolating bracket (Part No. 19) at both ends. Before tightening, confirm the O-ring (Part No. 102) is correctly seated on the screw plug (Part No. 13). A missing or pinched O-ring is the number one cause of a weeping sleeve end. |
| 6 | Screw the round bolts (Part No. 54), 6 pcs × M4×12L, back in on both the left and right sides. Tighten gradually and evenly in a cross pattern — do not cinch one bolt down fully before the others. |
| 7 | Refit the side covers (Part No. 64, 65) at both ends. |
| 8 | Switch the main circuit breaker and the relevant lamp circuit breakers back ON, then verify in the control panel's "Check Mode" that every lamp strikes and illuminates normally. |
C. Post-replacement checks
Confirm UV intensity stabilises above your system setpoint after the chamber is refilled and flow is restored.
Run one short ballast/deballast cycle and review the alarm list — no "UV lamp trouble" and no intensity alarms.
Log the replacement in the BWMS maintenance record: date, running hours of removed lamps, part numbers fitted. Port state control inspectors and your class surveyor will ask for it.
Part 2 — How to replace the quartz sleeves (lamp sleeves)
The quartz sleeve is what actually protects the lamp and transmits the UV-C dose. Replace it when you see cracks, cloudiness, discolouration, chipping at the ends, or reduced transmittance that does not recover after cleaning. Because the sleeve sits behind the lamp, the practical approach is to replace lamps and sleeves in the same maintenance window — the teardown is identical, so the only extra work is the sleeve itself.
A. Remove the old sleeve
Complete the full teardown above, up to and including removing the UV lamp (Steps 1–6). Remember the chamber must be de-energised, drained and depressurised before you pull a sleeve, and the automatic wiper should be parked clear of the sleeve path.
With the lamp out, remove the screw plug (Part No. 13) at each end. The O-ring (Part No. 102) on it is a consumable — it will be replaced, not re-used.
Withdraw the old quartz sleeve (Part No. 12) straight out along the chamber axis. Support the full length with two hands; quartz is strong in compression but fragile against point loads and side impact.
Inspect the bore and the sealing surfaces of the chamber. Wipe away scale, sediment and old O-ring residue with a soft, lint-free cloth. This is the step crews skip and regret — debris left in the seat becomes the leak path on the new sleeve.
Put the removed sleeve in a rigid container. Note its condition in the maintenance log (this drives your future replacement interval).
B. Install the new sleeve
Inspect the new sleeve for cracks, chips at the flame-polished ends and transit damage before it goes anywhere near the chamber.
Fit new O-rings (Part No. 102) on the screw plugs. Lubricate with a small amount of clean water or soapy water only — never petroleum jelly or oil, which attacks the elastomer and contaminates the UV path.
Slide the new quartz sleeve in and centre it so it sits evenly at both ends. Do not force it.
Refit the screw plugs (Part No. 13) and isolating brackets (Part No. 19) with the 1 pc M4×6L bolts at each end, then the 6 pcs M4×12L round bolts (Part No. 54). Tighten evenly and progressively; over-tightening a single bolt is how quartz ends crack.
C. Leak test and re-commissioning
Refill / pressurise the UV chamber and inspect both sleeve ends and screw plugs for weeping or drips. Dry the area first so any new moisture is obvious.
Refit the UV lamps following Part 1, refit the side covers (Part No. 64, 65).
Power up, confirm every lamp illuminates, and watch the UV intensity trend over the first cycle. Intensity should now sit measurably higher than before at the same water quality and flow — that delta is your proof the fouled or damaged sleeve needed replacing.
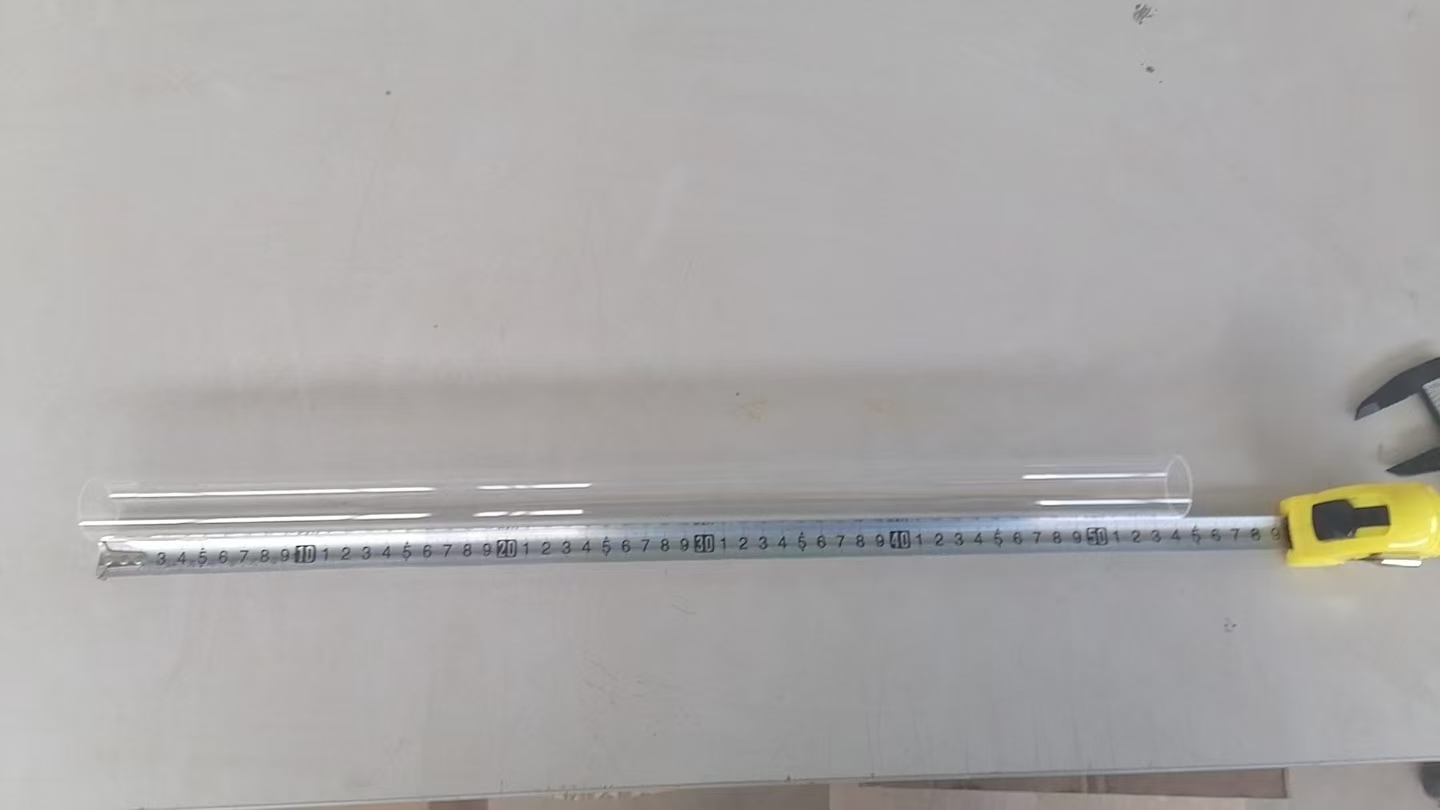
Sleeve length, outer diameter and end finish must match the chamber seat exactly. Measure the removed sleeve before ordering.
Practical tip: keep a spare sleeve and a set of O-rings (Part No. 102) on board per chamber. A sleeve is a low-cost part; a chamber that will not hold pressure during a ballast operation is not.
Which UV lamp and quartz sleeve does my Panasia system need?
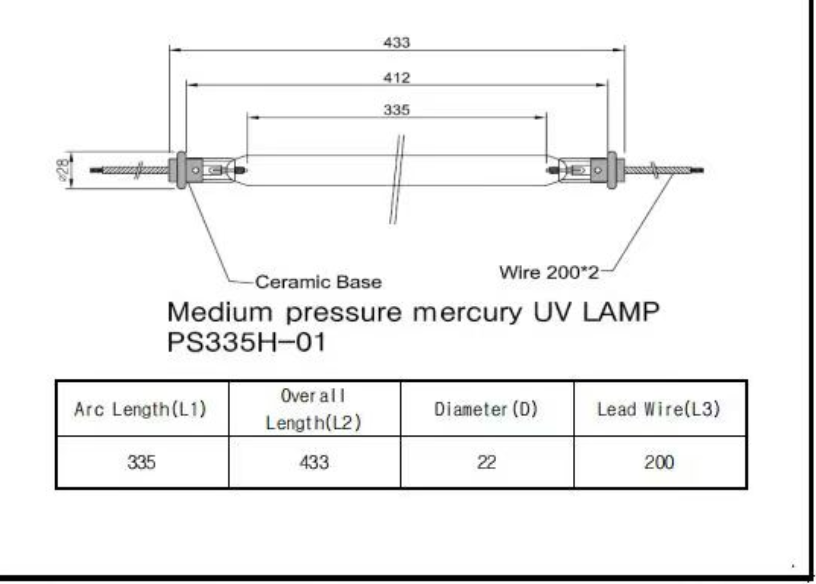
Fiver Ultraviolet manufactures OEM-equivalent replacement MP UV lamps and quartz sleeves for the Panasia GloEn-Patrol range. Match by total lamp length and wattage:
| Fiver replacement for | System | Lamp power | Total length | Product |
|---|---|---|---|---|
| Panasia Gloen PUL3.5_1 | GloEn-Patrol BWTS | 3.5 kW | 435 mm | 435 mm 3500 W UV lamp → |
| Panasia Gloen PUL3.5_2 | GloEn-Patrol BWTS | 3.5 kW | 480 mm | 480 mm 3500 W UV lamp → |
Both are medium-pressure lamps with broad-spectrum UV-C output, rated for up to 4,000 operating hours, and are dimming-compatible with the original Panasia electronic ballasts so the system's automatic 3-stage UV intensity control keeps working exactly as designed.
Not sure which you have? Measure the old lamp end-to-end (ceramic base to ceramic base) and photograph the terminal configuration. Our technical team will confirm the correct replacement — including the correct terminal option — before you order.
Troubleshooting after replacement
"Two UV lamps trouble" alarm — which lamp is actually faulty?
This alarm confuses a lot of engineers. On the GloEn-Patrol, two UV lamps are wired in series. If either lamp fails, the circuit breaks and the system reports two lamps in trouble, not one. So the alarm count does not tell you how many lamps are bad.
Use the Panasia UV Lamp Test Kit to find the real culprit:
Connect the test kit clamps to the UV lamp wires.
Press the test button (the unit switches itself off automatically after about 5 seconds).
Read the result: UV lamp ON + LED green → the lamp is GOOD; UV lamp OFF + LED red → the lamp is DEFECTIVE, replace it.
Caution: never touch the clamps of the test wires during a test — there is a high risk of electric shock. Wear insulated gloves whenever the test kit is in use.
Test only the lamp pair that the alarm points to, then re-test after replacing: if the alarm persists, the failure is in the second lamp of that series pair or in the supply/ballast side.
UV intensity low, but the lamps are new?
Work through it in this order:
Quartz sleeve fouling — the automatic wiper handles routine cleaning, but stubborn scale or organic film needs manual work: isolate power, drain the chamber and wipe the outer wall of the quartz sleeves with alcohol. Fiver replacement sleeves are manufactured for 90%+ UV-C transmittance to keep dose delivery high.
New lamps but old sleeves — a fouled sleeve can absorb enough UV-C to mask a fresh lamp's output. This is why we recommend replacing both together.
Lamp running hours or power stage — check whether the system has dropped to a lower intensity stage because of turbidity/UVT, rather than a hardware fault.
Sensor drift — see calibration below.
Annual UV intensity sensor calibration
Calibrate the UV intensity sensor once a year with a UV reference radiometer (for example a MUV 2.4 WR). If the deviation between the radiometer reading and the sensor output exceeds ±5%, replace the sensor. An uncalibrated sensor either hides a real performance loss or triggers nuisance alarms — both are compliance risks.
A maintenance schedule that prevents unplanned downtime
| Before each ballast operation | Check UV intensity reading and alarm list on the control panel |
| Monthly | Visual check of chamber for leaks at sleeve ends; confirm wiper operation |
| If intensity falls below setpoint (e.g. 93 mW/cm²) | Manual alcohol wipe of quartz sleeve outer walls |
| Every 12 months | UV intensity sensor calibration with a reference radiometer (replace if deviation > ±5%) |
| Every ~4,000 running hours | Replace UV lamps — and inspect / replace quartz sleeves at the same time |
A single planned maintenance window that changes lamps and sleeves is almost always cheaper than an unplanned one — in parts, in crew hours, and in the risk of a failed discharge at the berth.
Seven mistakes to avoid
Not isolating the UV power supply panel breakers — the main breaker alone may not de-energise the lamp circuits.
Handling the new lamp with bare hands — fingerprints on the quartz envelope shorten lamp life.
Reusing the old O-ring (Part No. 102) — always fit new ones; they are the primary seal.
Over-tightening the M4 bolts — this is the fastest way to crack a quartz sleeve end. Tighten evenly, in a cross pattern.
Replacing lamps but leaving fouled sleeves in place — the new lamps will underperform and you will be back inside the chamber within weeks.
Ignoring the two-lamps-in-series logic — always identify the genuinely failed lamp with the test kit before ordering spares.
Not logging the change — running hours and part numbers on record are your evidence of a maintained, compliant BWMS.
Safety, mercury handling and disposal
UV radiation: do not look at an energised lamp without UV-rated eye protection, and do not operate the chamber with covers removed.
Heat: medium-pressure lamps reach very high surface temperatures; allow the full cooling period before handling.
Mercury: lamps contain trace mercury. Keep spares in their packaging until installation. If a lamp breaks, collect the fragments immediately in a sealed container to limit mercury vapour release, ventilate the space, and dispose of the waste through a facility authorised for mercury-containing lamps — never in general ship's waste.
Explosion-proof chambers (PU###-Ex): the lamps themselves are the same as standard models, but the power supply wiring must use intrinsically safe cable and maintain the required minimum separation from standard cables. Do not improvise cable routing.
Frequently asked questions
How often should I replace UV lamps in a Panasia GloEn-Patrol system?
Plan on the interval in your approved maintenance plan — typically around 4,000 operating hours for Fiver's OEM-equivalent MP UV lamps. Actual life depends on power cycling, dimming stages and water quality, so let the logged UV intensity trend and lamp hours drive the decision, not the calendar alone.
Can I replace the lamp without replacing the quartz sleeve?
Yes, mechanically. But if the sleeve shows any scaling, cloudiness, cracks or age-related wear, change both at the same time. A fouled sleeve can pull performance down even with a brand-new lamp, and you will have done the whole teardown twice for nothing.
How do I know when the quartz sleeve needs replacing?
Look for scaling, cloudiness, discolouration, chips or cracks at the flame-polished ends, and for UV intensity that does not recover after manual alcohol cleaning. Water weeping at the sleeve end means the O-ring or the sleeve seal has failed and it should be changed immediately.
Why does one failed lamp trigger a "two UV lamps trouble" alarm?
Because the lamps are wired in series. Break one, and the whole series circuit opens. Use the UV Lamp Test Kit — clamps on the lamp wires, press the button, green LED = good, red LED = replace. The kit switches off automatically after about 5 seconds.
Are Fiver replacement lamps compatible with Panasia electronic ballasts?
Yes. Our GloEn-Patrol replacements are built to match the original electrical and physical parameters, including full dimming compatibility, so the system's automatic multi-stage UV intensity control continues to work as designed.
Do I need special gloves?
Two sets, ideally: insulated gloves for electrical and test-kit work, and clean, powder-free gloves for handling the lamp and sleeve so you never touch quartz with bare skin.
What if I cannot identify the exact lamp model on board?
Measure the lamp end-to-end and note the terminal type, then send us the details. We will match the correct replacement from the GloEn-Patrol range, including the correct terminal option for your chamber.
How much can I save versus OEM spares?
OEM-equivalent MP UV lamps and quartz sleeves typically cost substantially less than the OEM channel, and because they are a direct fit you avoid modification or re-engineering costs. For vessels with multiple chambers, the annual saving on a full lamp-and-sleeve change-out is significant.
Will using compatible parts affect type approval or my warranty?
Fittings that meet the original specification for the lamp/sleeve interface do not change the system's type approval. We supply parts engineered to the original parameters so the BWMS continues to operate within its certified design.
What happens if I keep running with degraded lamps?
Logged UV intensity falls below the setpoint, the BWMS may refuse to discharge, and you risk non-compliance with IMO D-2 and USCG requirements — failed inspections, fines or detention. It is the most expensive way to save on a lamp.
Do you supply spare parts other than lamps and sleeves?
Yes. Alongside UV lamps and quartz sleeves we supply BWTS spares including lamp power supplies / LPS, UV sensors, temperature transmitters and filter and valve components.
Can you support the installation?
Our technical team works with GloEn-Patrol systems regularly and can confirm part selection, terminal configuration and terminal count, and answer questions before, during and after your change-out
Why crews choose Fiver for Panasia GloEn-Patrol replacement parts
Manufacturing UV lamps, Electronic UV Ballasts and water purification equipment since 2011 — exact-fit lamps built to the original GloEn-Patrol electrical and physical parameters, with full dimming compatibility, burn-in tested output and 90%+ transmittance quartz sleeves. Deep Panasia inventory for fast dispatch to major shipping hubs.
Final thoughts
The GloEn-Patrol UV chamber is a simple system with one unforgiving requirement: the right dose at the right time. Lamps and quartz sleeves are the two parts that decide whether you meet it. Follow the six-step teardown, keep the M4 bolts and the O-ring (Part No. 102) in the right places, never touch quartz with bare hands, and use the UV Lamp Test Kit to diagnose the series-circuit alarms correctly — and the job is a routine maintenance task instead of a portside emergency.
Replacing equipment on a different UV BWTS? Read our sister guide: How to Replace UV Lamps and Quartz Sleeves for Alfa Laval PureBallast BWTS.
Post time:2026-09-14
